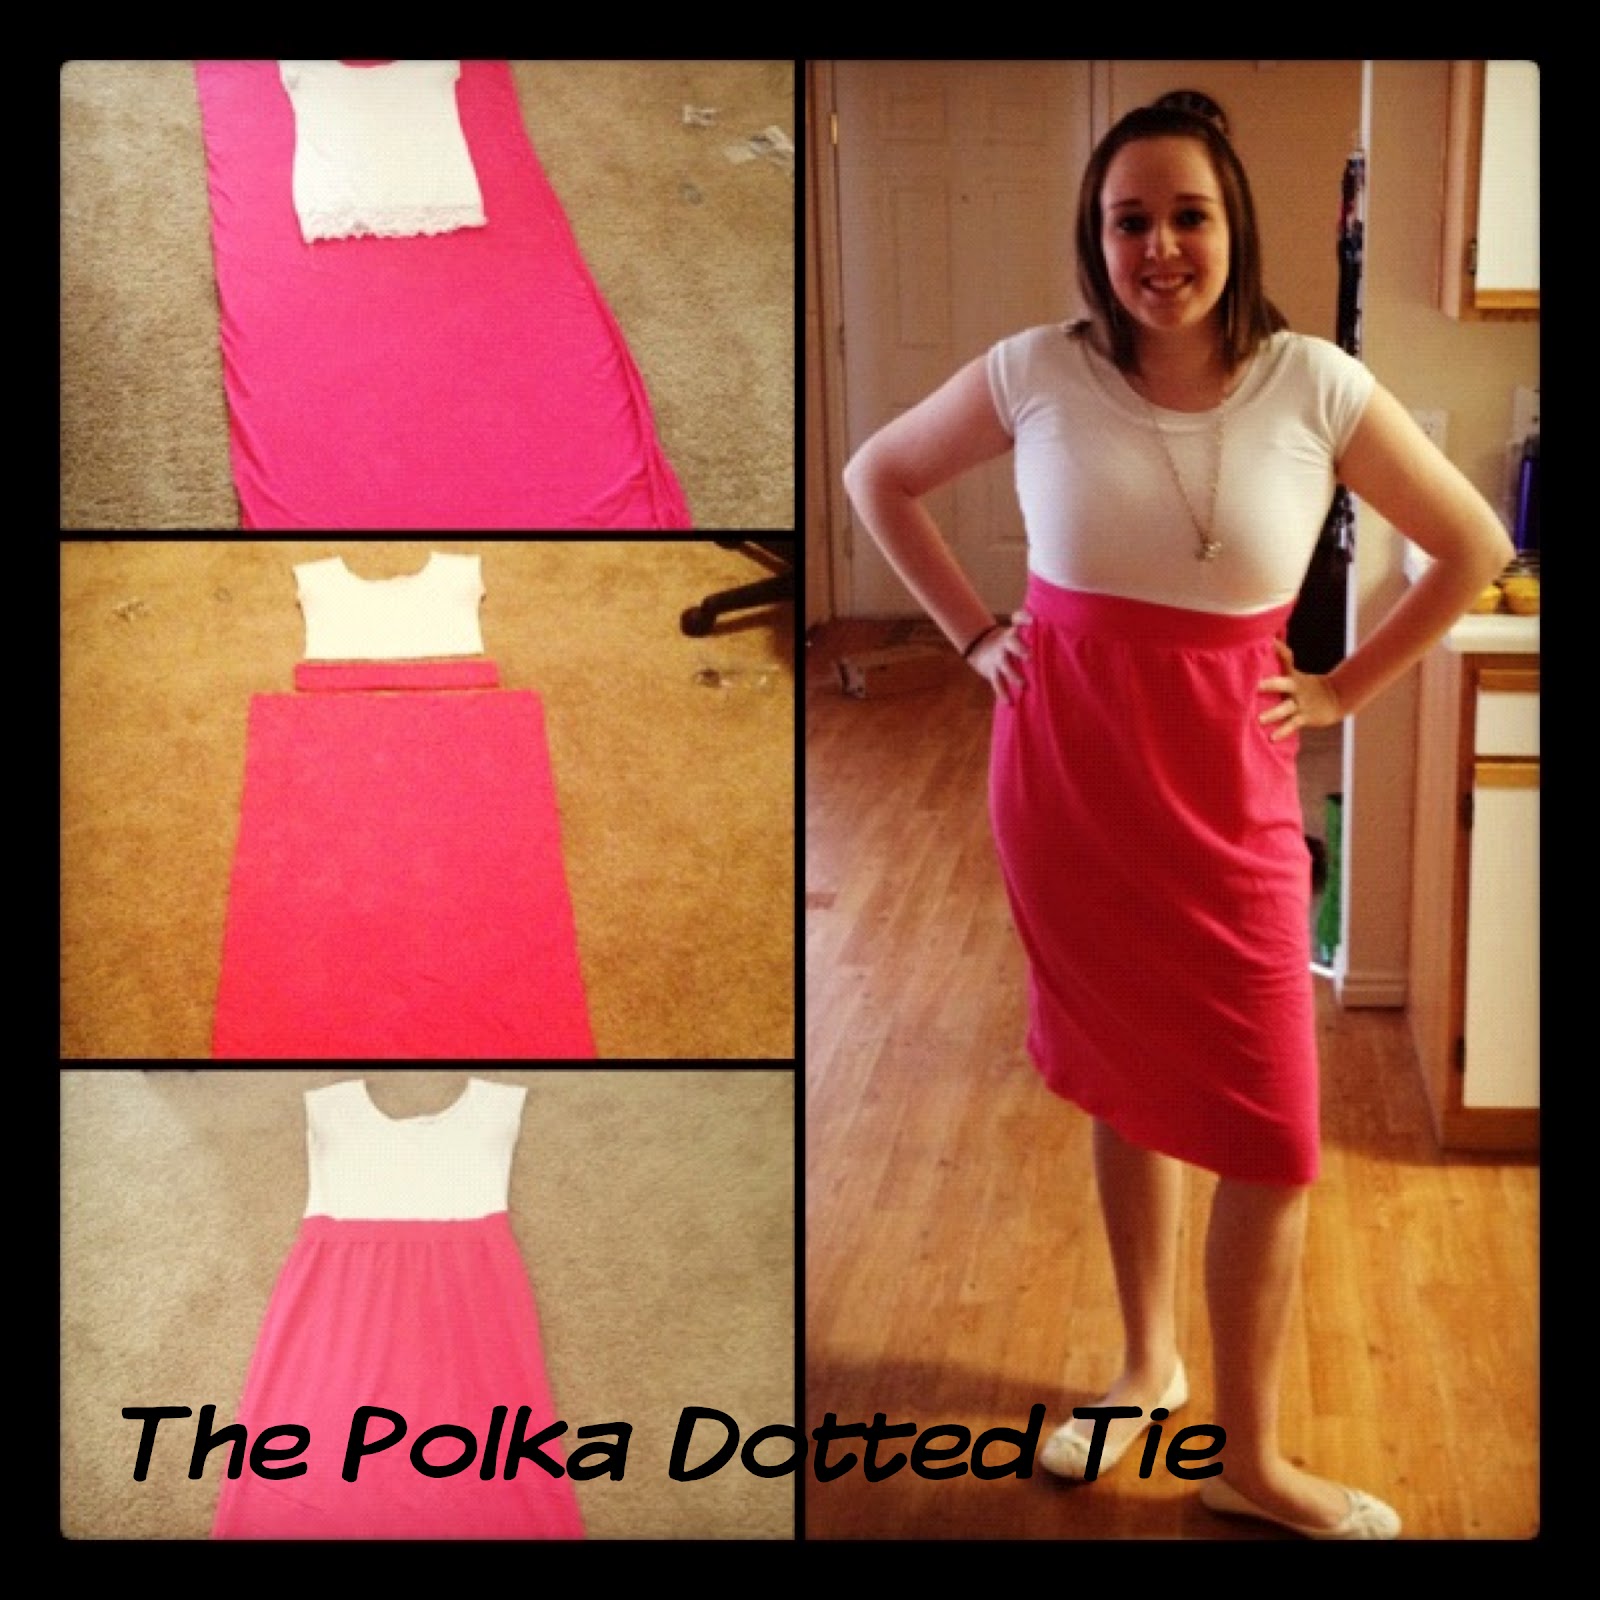
Yes, you did read that right. Shirt & sheet dress.
This weekend, I was going to try to make a Maxi Skirt, but I had a change of plans.
Instead, I made me a new dress!
I had it pictured it my head, and in my head it was dang cute.
But, seeing if I could make what was in my head in real life was the challenge.
I think I did pretty good.
It turned out wearable, in fact I'm wearing it at work today :)
A quick picture of all the steps.

Wanna know how I did it?
Here is for my friends that have said I should teach them.
It was pretty simple.
If you did it in one seating it'd probably take a few hours, I did it over two days.
First get your supplies:
- I used a shirt that I like the fit of (I just so happened to get spaghetti sauce on it earlier this week, all across the bottom.. so instead of chucking it in the garbage, I decided to use it to make a dress!)
- I then got a twin jersey knit sheet. (just a heads up, sewing with jersey is much more difficult then I had expected. It is just so stretchy! So just be careful when cutting it that you don't pull it, because it'll stretch and your cut will be off.)
- Depending on what material you use, you might need a special sewing needle. I had to use a ballpoint needle for the knit fabric.
Here you see the shirt I used, with the sheet folded in half.
Step One
Take your shirt, and put it on. You'll want to measure about where you want the skirt to hit. I wanted an empire waist so I put a pin about where I wanted it. Take the shirt off, and the cut across the shirt 1/2 inch below where you wanted it to hit (this is for the seam allowance)
Step Two
Take the sheet (remember I used a twin size) Fold it in half and cut it. (I'm going to use the other half of my sheet to make that Maxi skirt I originally planned on making this weekend) If you want your dress to be a maxi dress, or more of a fuller skirt, you might need a bigger sheet.
Step Three
Now you'll make the waist band. I wanted a two inch waist band, so I made it three inches wide, so I had 1/2 inch seam allowance on both top and bottom. Take the shirt that you cut, and measure it, make the lenghth of your waist band 1 inch longer then that, again so you have 1/2 inch seam allowance on both sides. So my waist band was 16 1/2 inches by 3 inches. Cut that out, remember if you are using a stretchy fabric like jersey knit, don't pull it when cutting it, it'll become a funky shape.
Step Four
Next is the skirt itself. I wanted a little bit of a fuller skirt, instead of something straight down, hugging every little curve on my body, I like to hide those instead :) So for my skirt I cut it 23 inches wide, and then I made it about 30 inches long, leaving room to cut off and hem once it was sewn.
Here is my shirt that I cut, the waist band, and the rectangle I used for the skirt
Step Five
Now begins the sewing. ( I should have taken more pictures of these steps.. But I didn't know if it would actually turn out how I wanted it)
Take the two skirt pieces, and you are going to baste stitch each one, but NOT together, just on their own. This is so you can create the ruffle. Because if you notice the skirt is wider than the waist band. You want to create and even ruffle, with the baste stitch you can. So baste these, then line them up with your waist band (right sides of fabric together") and start pulling on one of the strings to create the bunching. Ones they are the same size, even out the ruffles so you don't just have a huge mass of ruffle in one spot. Then pin, the fabrics together, again if you are using a stretchy fabric, USE LOTS OF PINS so they don't stretch or move as you sew.
Repeat this for the other half of the skirt. Then you'll sew. Make sure you change the length of stitch on your machine so you aren't just basting the two pieces together, you'll want to actually sew them. I used a 1/2 inch seam allowance. Once you sew, remove the baste stitch. You'll now have the two halves of the skirt.
Step Six
Take the two halves and put them right side together, pin along the sides, make sure you line up the seams on the waist band to each side, so they line up and don't hang funny. Be sure to use lots of pins, you don't want the fabric moving. Again using 1/2 inch seam allowance sew the side up, repeat this step with the other side. You'll then have the complete skirt!
Step Seven
You're almost done. Now you are going to sew your skirt, to the shirt. Leaving the skirt inside out, take the skirt put it down in the skirt, so the outside of the skirt and the outside of the shirt are touching (you know.. right sides together) line up the cut edges, and line up the side seam on the shirt, with the side seam on the dress, pin, and pin all the way around the shirt. My shirt was a pretty stretchy shirt, so I used lots of pins again. Once you have it pinned, sew around using a 1/2 inch seam allowance. Turn your dress right side out and you should have something like this
Step Eight
Now it's time to hem. Try your dress on, (I should have taken a picture, mine hit to just above my ankle when I put mine on) measure where you want it to hit, then make a mark and take the dress off. Measure that all around the dress, (remember since it's bunched, you can't just cut straight across and have it be the same length, you could still do this and have it work out, it might just pucker more when you hem it) So I measured down from the bottom seam of the waist band where I wanted mine. I went with 25 inches, so I could use a 1 inch hem. So using your ruler, or measuring tape, measure from the bottom seam of the waist band, and mark your dress. (I also did this on the inside of the dress, so you'll have to flip it inside out) Once you've made your marks, cut the excess fabric off.
Step Nine
Measure around your dress again, this time from the bottom, for your hem, I used a one inch, so going around your dress pin up the bottom one inch. Once you've pinned, (you're dress should be inside out for this, so you should be pinning wrong sides together now) Sew around the bottom, using a 1/2 inch seam. Press the hem down.
Turn your dress right side out again, and you should be good to go!
And again, here is my completed dress :) It is so comfy I love it!
I can't wait to make a maxi skirt. I'll share a picture with you when I have it finished. Maybe this time I'll take more pictures along the way.